Tuesday, April 5, 2016

Dresser Makeover!

I love spring time! Why? Because it just inspires you to get creative! If you know my family life at all, you know that we are very cozy in our lil' cabin in the woods. ;) Meaning until we begin our renovations we're tight on space. As any Mom, my goal would be to be totally organized but lets be realistic... I have 4 kids...  #real life struggle

I also love saving some money so rescuing this lil' ole dresser from our shed was perfect for our media storage needs! It added a bright pop of color in the kids/our gym area and makes this MaMa feel like she's a lil' ant step closer to being organized!

Here's how I achieved the perfect distressed look for us!


The dresser, being a cheap made one, had a sheen to it so I primed it first with my favorite primer, Gripper! You can find it at your local Home Depot!


After that I brushed on my peek through color being sure to focus on applying it to the edges that furniture normally shows wear. For both my peek through color and main color I used Glidden paints also from Home Depot!


Alright ya'll... Sometimes you have to improvise! lol! I normally use Vaseline but couldn't find it any where! See! I told you I'm trying to focus on getting organized! ;)  I did however find some Aquaphor which works just as well but I'd still recommend using Vaseline cost wise! I applied this after my peek through color was dry along a majority of the edges, again...where the furniture would normally show wear (were my peek through color was)


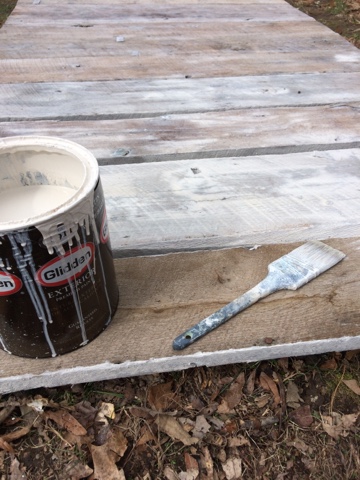
My tip of the day.... I'm not gonna lie, I'm a lazy painter sometimes! lol! Using a sheet of heavy duty foil saved me from having to wash out my paint tray! You're welcome!


I then applied/rolled on my main color!

 
The exciting part.... Taking fine sand paper and hitting the edges, taking off the top layer of color, therefore exposing the peek through color!


Have I told you how addicted I am to distressed things!


Although I didn't need to I did seal it with a wax to help preserve it. Ya know... 4 kids! ;)


Added some cute bronze knobs and finally.... the finished product! Family approved!


Have a Blessed Day Ya'll!
T

Sunday, March 13, 2016

Progress...


What can I say... Life is nothing but chaos! Just in the past week or two we've finally had a chance to resume working on the cottage! You know... the never ending schedule us adults have to deal with! ;)
We're still far from being done but progress is progress in my book! Yay for amazing weather and a chance to actually work on it!
 
As you can see below the floors, trim, faux finish, whitewashed farmhouse wood and hung the chandelier! Here's a lil' sneak peak of our progress!

 Who doesn't need a chandelier over their desk! We used the farmhouse wood to
 finish underneath the loft.


Future craft space!


I'm seriously head over heels for the whitewashed farmhouse wood!


Wishing you a blessed Day!


Sunday, November 22, 2015

Planner CaRaZy!!!


Let me start out by saying how head over heels I am about my husband because he lets me shop for myself for Christmas! Another thing I'm head over heels for... Pretty Things! Pretty Graphics! Pretty Planners! Pretty Patterns! Ahhhhhgggg.... I just can't get enough!!! 

So let me rewind a second! Last Christmas I tried my first designer planner. An Erin Condren planner! Love the graphics and the personalization but style wise it just wasn't the right fit for me but definitely check her amazing products!
 
Fast forward to now....
I have spent many hours searching for what I think is my soul mate planner! 
 
Fingers crossed and an Etsy order placed, I'm hoping that I'm a step closer to "the one"!
 
I purchased the follow goodies from a cute lil' Etsy shop called SharBearCrafts

Did I tell you how much I love patterns and metallics! Ooooooh... METALLICS! ;)

And can you say Platinum!!!


And I just can't.... Polka Dots!!! #love


Now for all the little goodies to make it even more fabulous!!! 

Dash Board Inserts


Calendar Stickers


Must Have Stickers


Washi Tape Book


So.... Here I sit already anxiously awaiting for it to come in because let's be honest folks.... The hubs will let me rip open the box and start creating my special little master piece because he loves me even though it's not Christmas yet! Right babe! ;) 
Bring on 2016!!!

Stay tuned for my personal review! 
 
Blessed always... T

Friday, November 6, 2015

{It's all about that Powder}


Finally... My first beauty post! And the spotlight is on Creek Baby's Arawak Face Powder!

If you don't know me by now I'll fill ya in a lil'! As a Mom of 4 I strive to use natural products as much as possible! I'm not an all out organic natural freak but I think that making daily decisions to put you and your family's health first is something to strive for.

Do I still use products that I love that aren't organic or natural? Absolutely! But I'm constantly looking for the best product that works for me! 

So.... I'm so excited about sharing this particular product for many reasons!

• It's hand-crafted in the Ozarks 
   (My back yard)
• It's all natural organic ingredients 
• It helps smooth out your complexion and helps resolve acne

I'll be honest... I was skeptical when I first tried a sample of it. Being made from arrow root powder, nutmeg, cocoa powder, cinnamon and turmeric, it's not the finest powder. I almost felt like it was grainy on my face until... I figured out 
 
1. That I wasn't using the right foundation. Post coming soon! 
2. I wasn't applying it right! 


Here's my personal tips on application! 
After applying my full coverage liquid foundation, using a foundation brush I lightly dip it into the container (the wide mouth container is da bomb) gently tap to knock off the access and gently sweep it covering my whole face! 

All though it's comes in 3 different shades, light, medium and dark, it tends to blend very naturally! I'm a total white girl but use the medium shade to give me a lil' color! 

So.... To celebrate my first beauty post I'm hooking you up with a 10% off your first order of Creek Baby! Just select Tina and enter code: TINA10

Hope you enjoy their products as much as I do! 

{T}

Saturday, October 10, 2015

{Windows are the eyes of the Cottage}


Or so they say, right!!!! ;) Finally had a chance to hang these gorgeous oak shelves.

If you know me at all, you know that I'm all about a distressed finish which is why I did a white wash technique using the same color aqua that I painted the front door in! And the best part... The wood came from a friends old homestead! Love that! 


There are so many white washing recipes out there! I found that it honestly comes down to personal preference! I started out with 3 parts water 1 part paint but after painting a board decided I wanted a lil' more of a sheerness to it. So my recipe ended up being 4 to 1! 

 
I'd recommend mixing it in a bigger container so you have plenty is room to mix it! 


Since I only did two boards today I just brushed it on but when doing multiple boards I'd recommend a sponge roller!

Wishing you a blessed day! 
T

Thursday, October 8, 2015

{Design sneak peek}

Of course I had to do a sneak peek!!! This whole she shed/cottage project has been so exciting! I love being able to put my heart into something where every detail matters! Check out these amazing doors I found for $20!!! Score!!! The patina on these alone... priceless!


Have a 100% decided but I'm loving this aqua print for my wicker couch!


I'm so in love with the color palette for the floors! Can you say... BOLD stripes!

 
This picture does this wood no justice! I did a white washing technique except with the same aqua that I painted the door with! Tutorial coming soon on that! ;) This material will be finishing out my ceiling!! Besides being an old wood it's been passed on from a friends old homestead! Love it!

 
Hope you have the best day!
T

Wednesday, October 7, 2015

It's all about details

Details can make a huge difference  when it comes to final touches!  I have to have things flow as far as design! For example.... Who had to color match her exterior outlets? This girl!!! Lol! Here's how I made it happen!
My ugly commercial grey outlet covers!
 

I'd like to think I'm genius but... I'm not! ;) I did however manage to come up with this nifty idea to prop open the covers since they were spring loaded with my handy dandy paint can openers! 
Found the perfect color by Rustoleum. 


After one coat of paint
 

Didn't I say it's all about the details! ;)
Perfect way to make sure your screws blend in too! Poked them into a piece of styrofoam so they stayed up right while spraying!


After the first coat was dry I put them on the exterior wall of my shed. Taped and sprayed another coat to cover any exposed grey from being hinged open!
 

Tadaaaaahhh!!!  And here's how they turned out! So much prettier than the commercial grey color!
 
 
Till next time!!!!
T